
 Doc Summary

Trigger Stats gives you real-time visibility into how each workflow trigger is performing in OneSystemCRM. See Attempted, Matched, and Unmatched counts at a glance, drill into contact-level reasons for mismatches, and filter results to validate logic quickly.
What are Trigger Statistics? #
Trigger Stats is a diagnostic view inside the Workflow Builder that measures whether contacts qualified for each trigger. It surfaces totals (Attempted, Matched, Unmatched) and lets you click into a detailed panel to see the exact reason a contact did or did not match so you can fix filters, update data, and confirm changes without leaving the builder.
Key Benefits of Trigger Stats #
- Faster Debugging: Real-time counts reveal which triggers aren’t matching as expected.
- Contact-Level Clarity: Open a panel with the contact, timestamp, match status, and the reason for unmatch.
-
Actionable Reasons: Review the Top Reasons for Unmatch (e.g., filter mismatch, missing values) to prioritize fixes.
- Immediate Validation: Adjust trigger filters and watch the stats update live as new events occur.
- Targeted Analysis: Filter by date range or search a specific contact to isolate anomalies.
-
Confidence in Logic: Reduce guesswork and ensure the right contacts enter the right workflows.
Trigger-Level Performance Metrics #
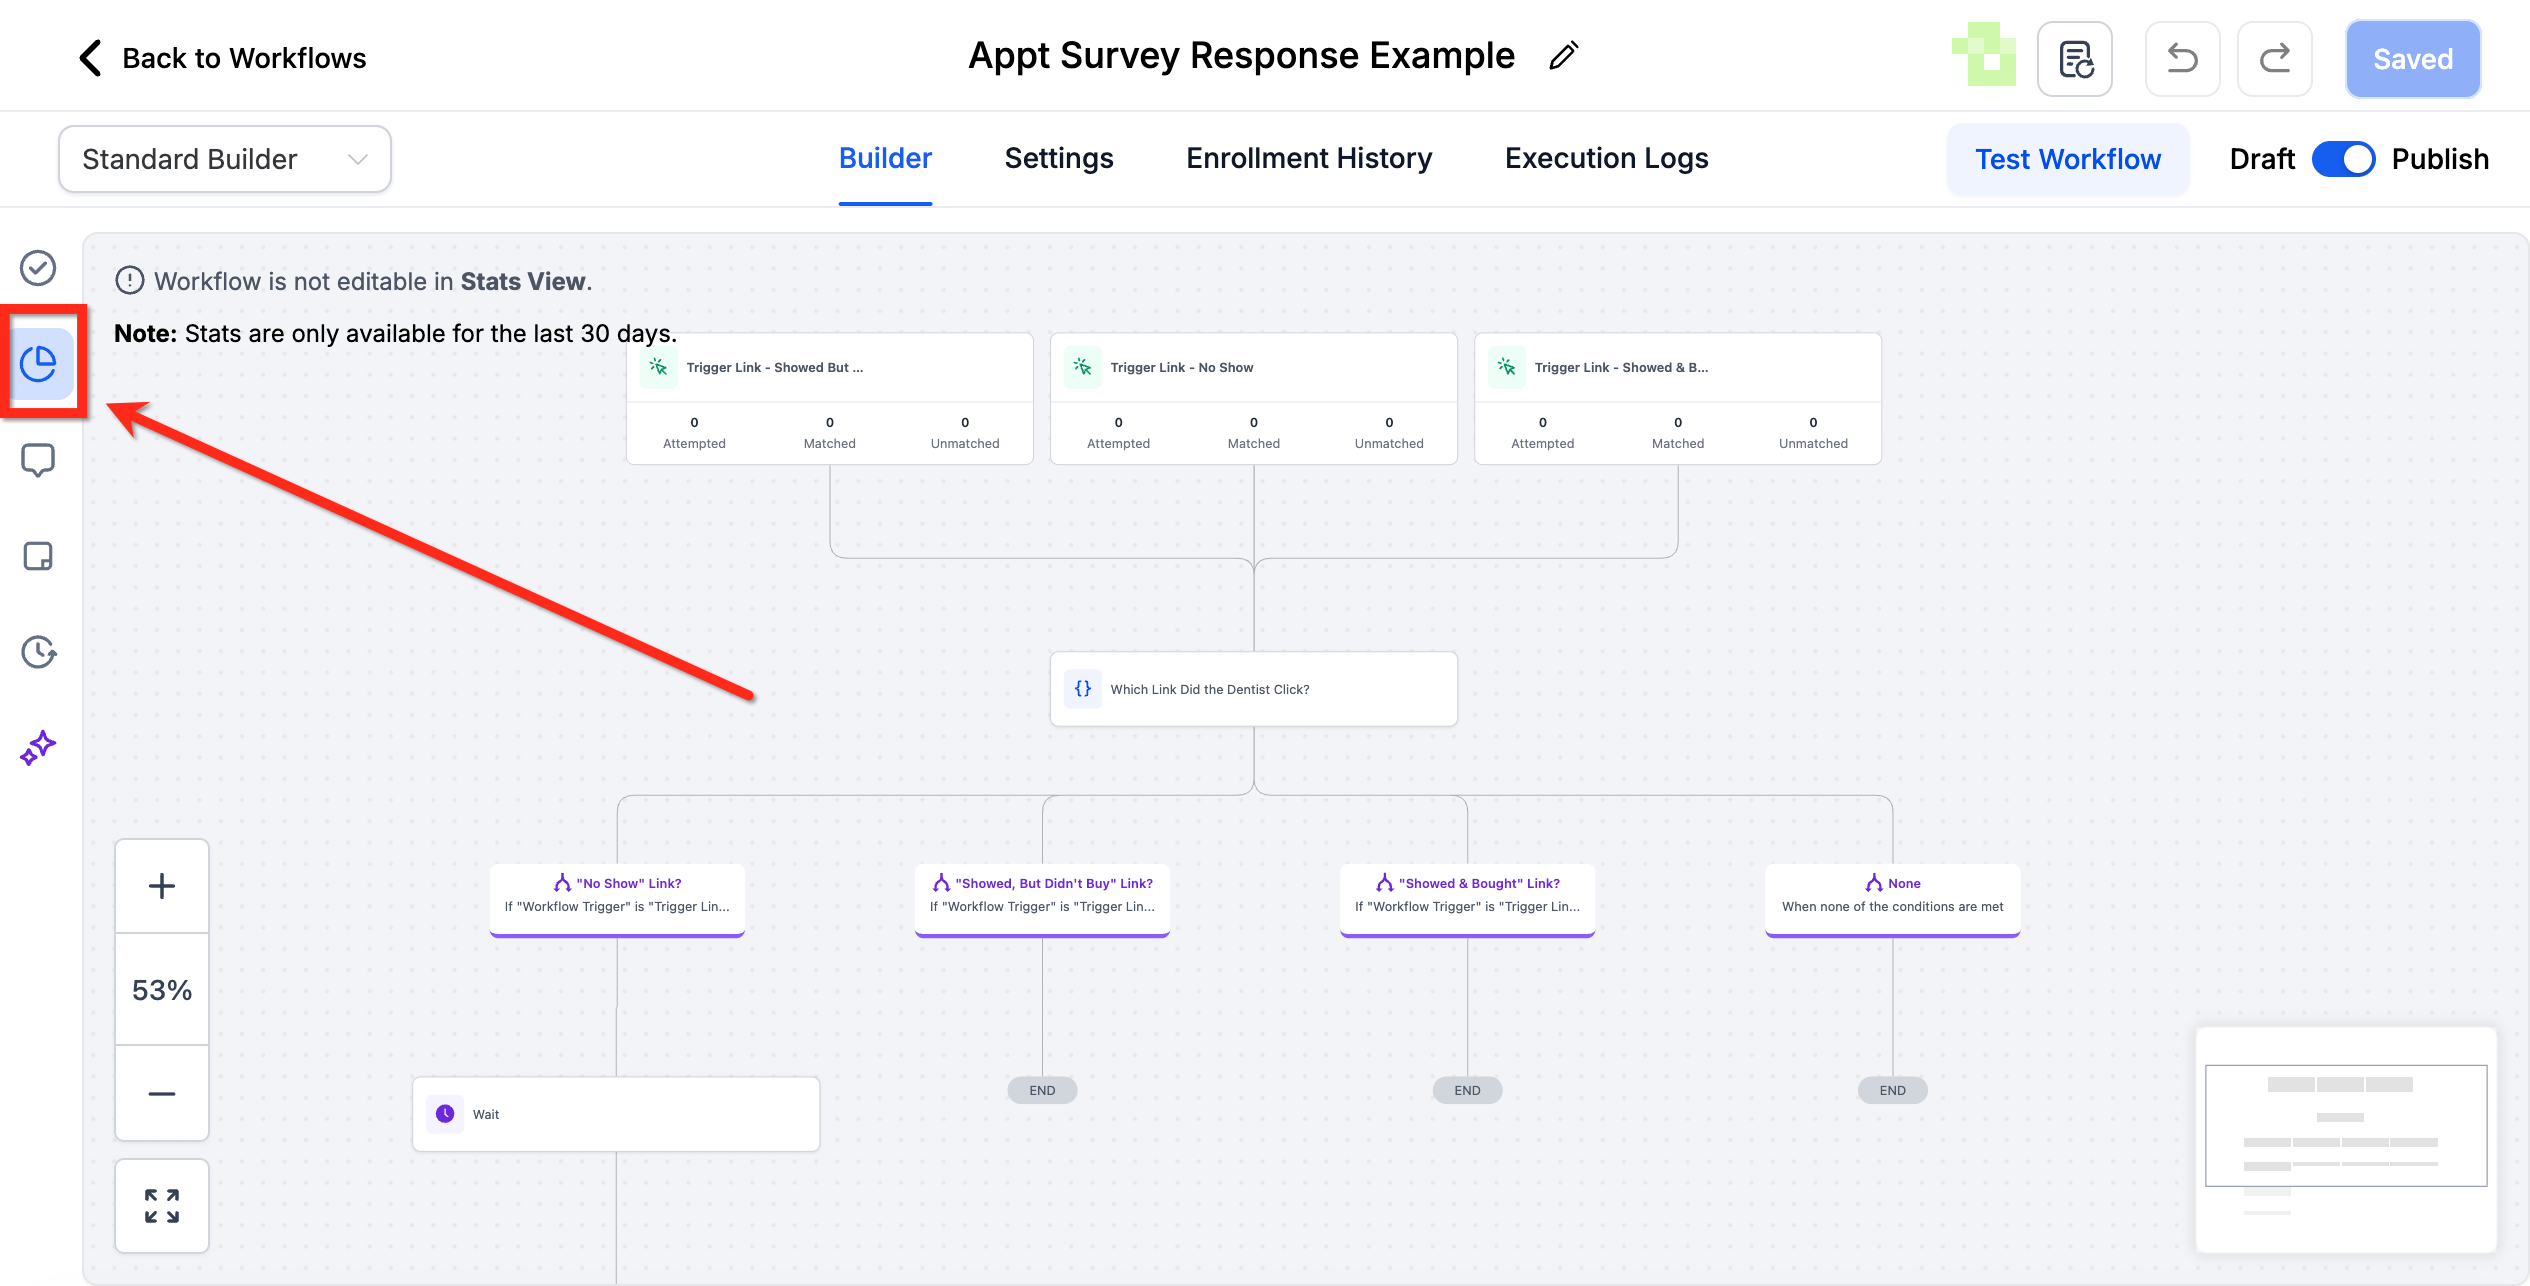
Instantly understand trigger effectiveness. Each trigger card in Stats View displays:
- Attempted – total contacts evaluated.
- Matched – contacts that met all conditions.
- Unmatched – contacts that did not qualify.
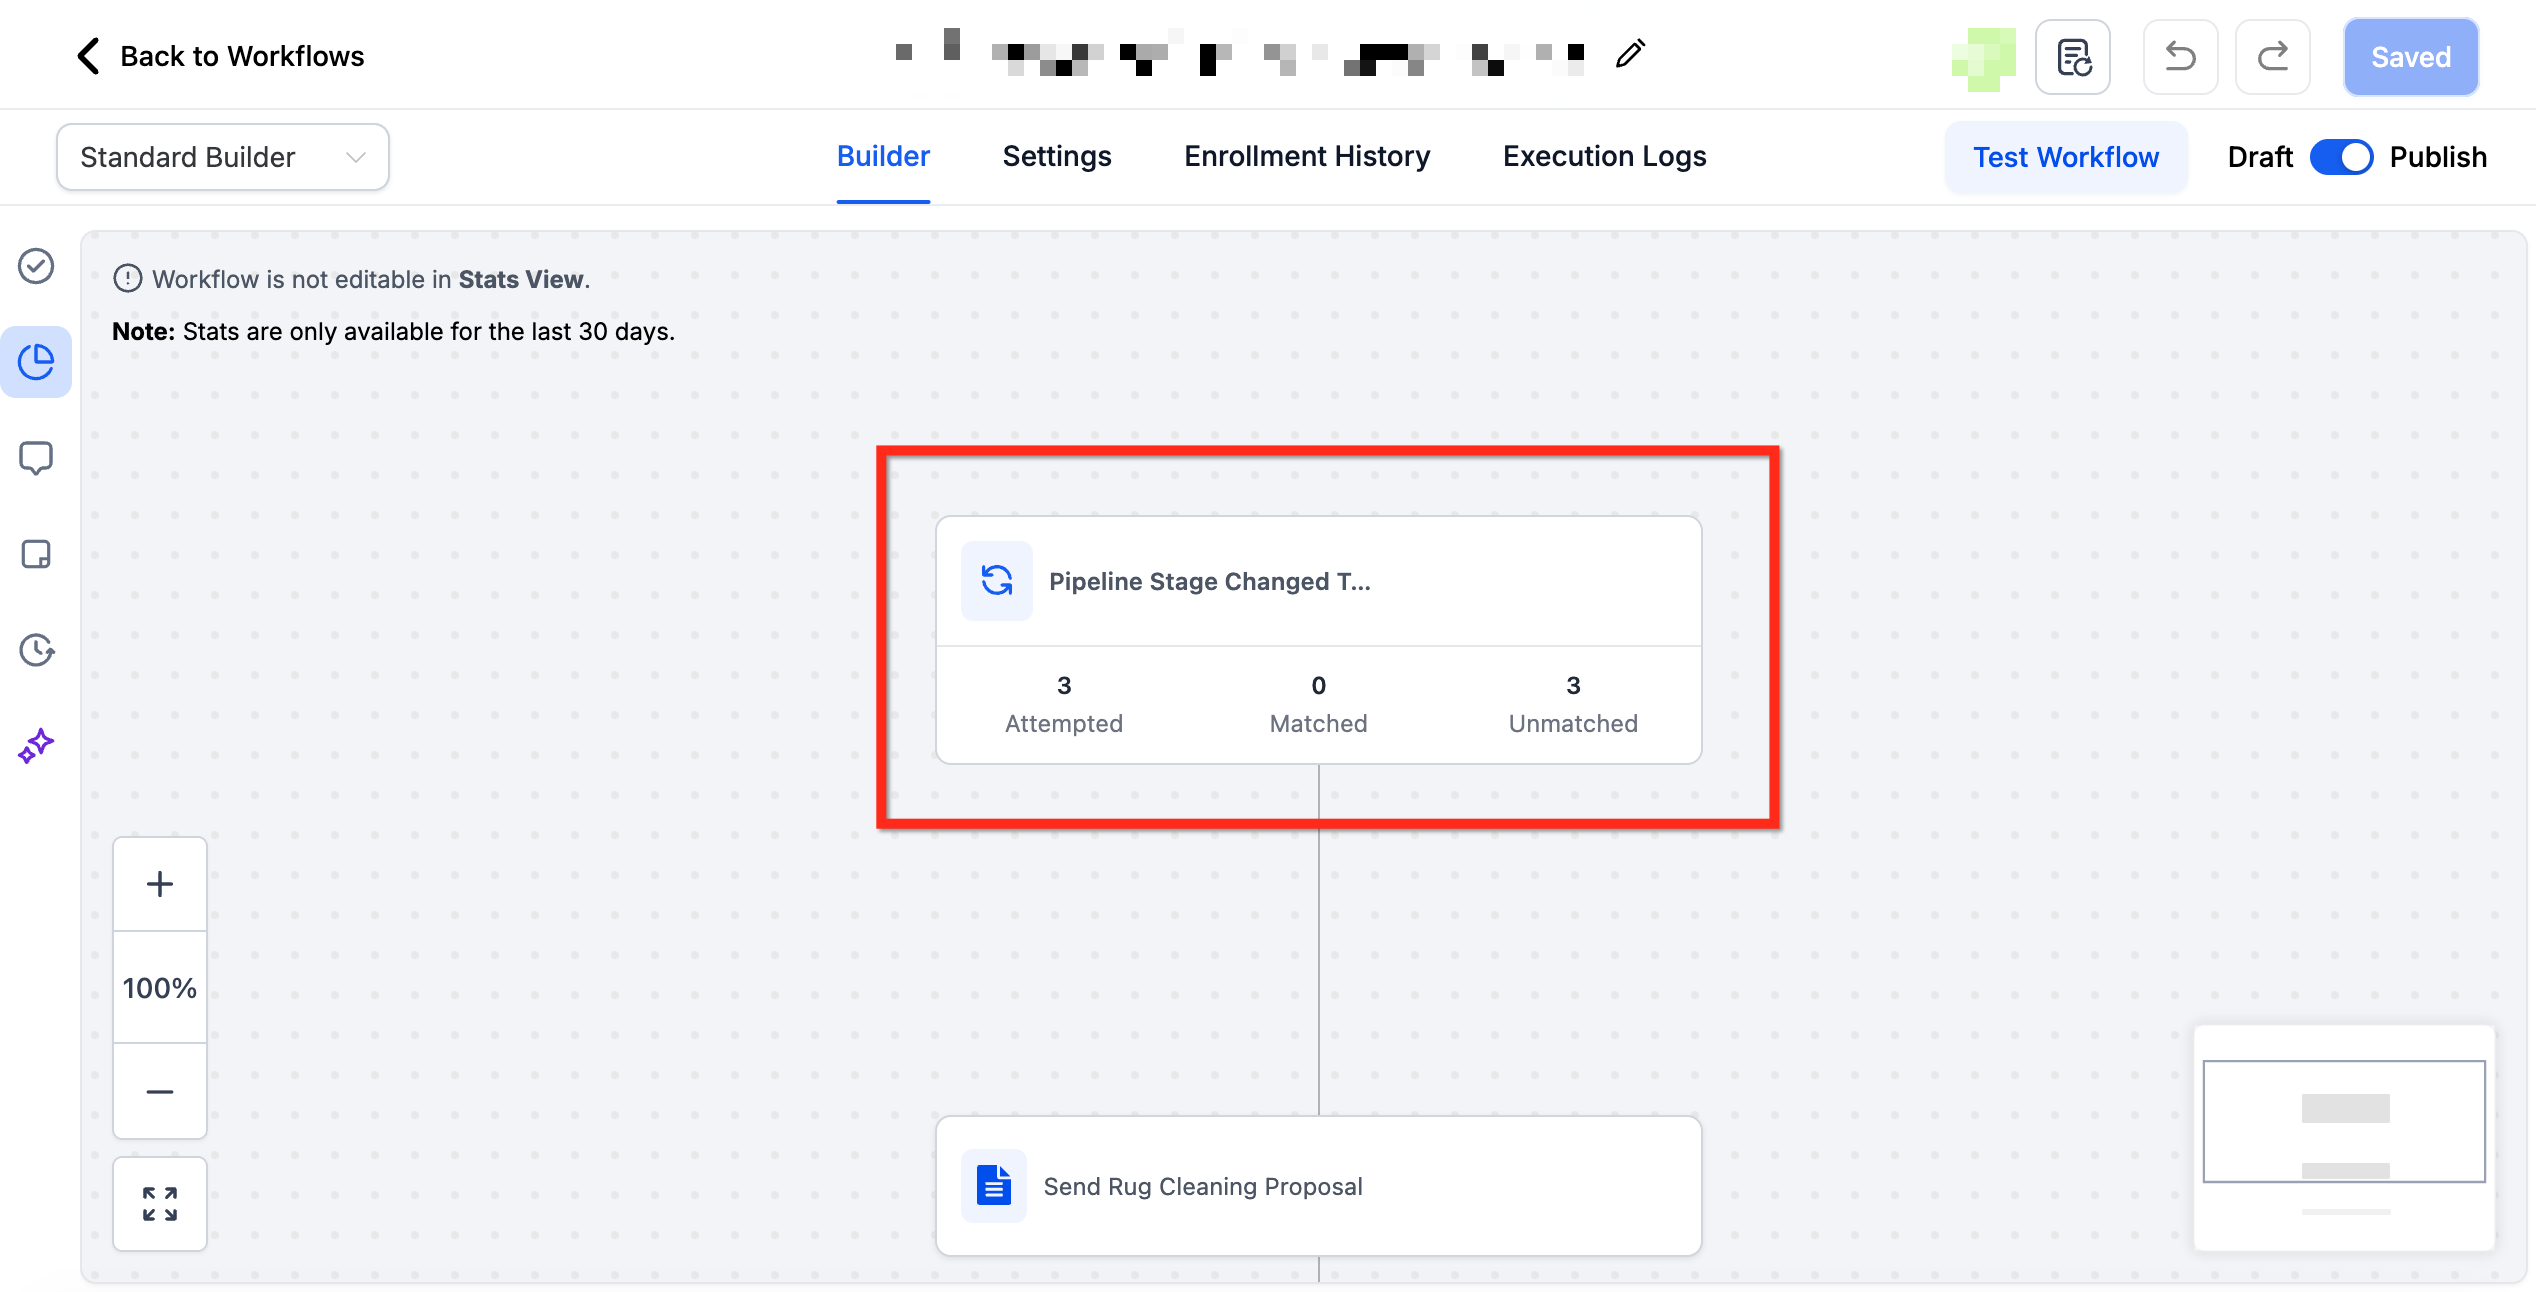
Trigger Stats Panel #
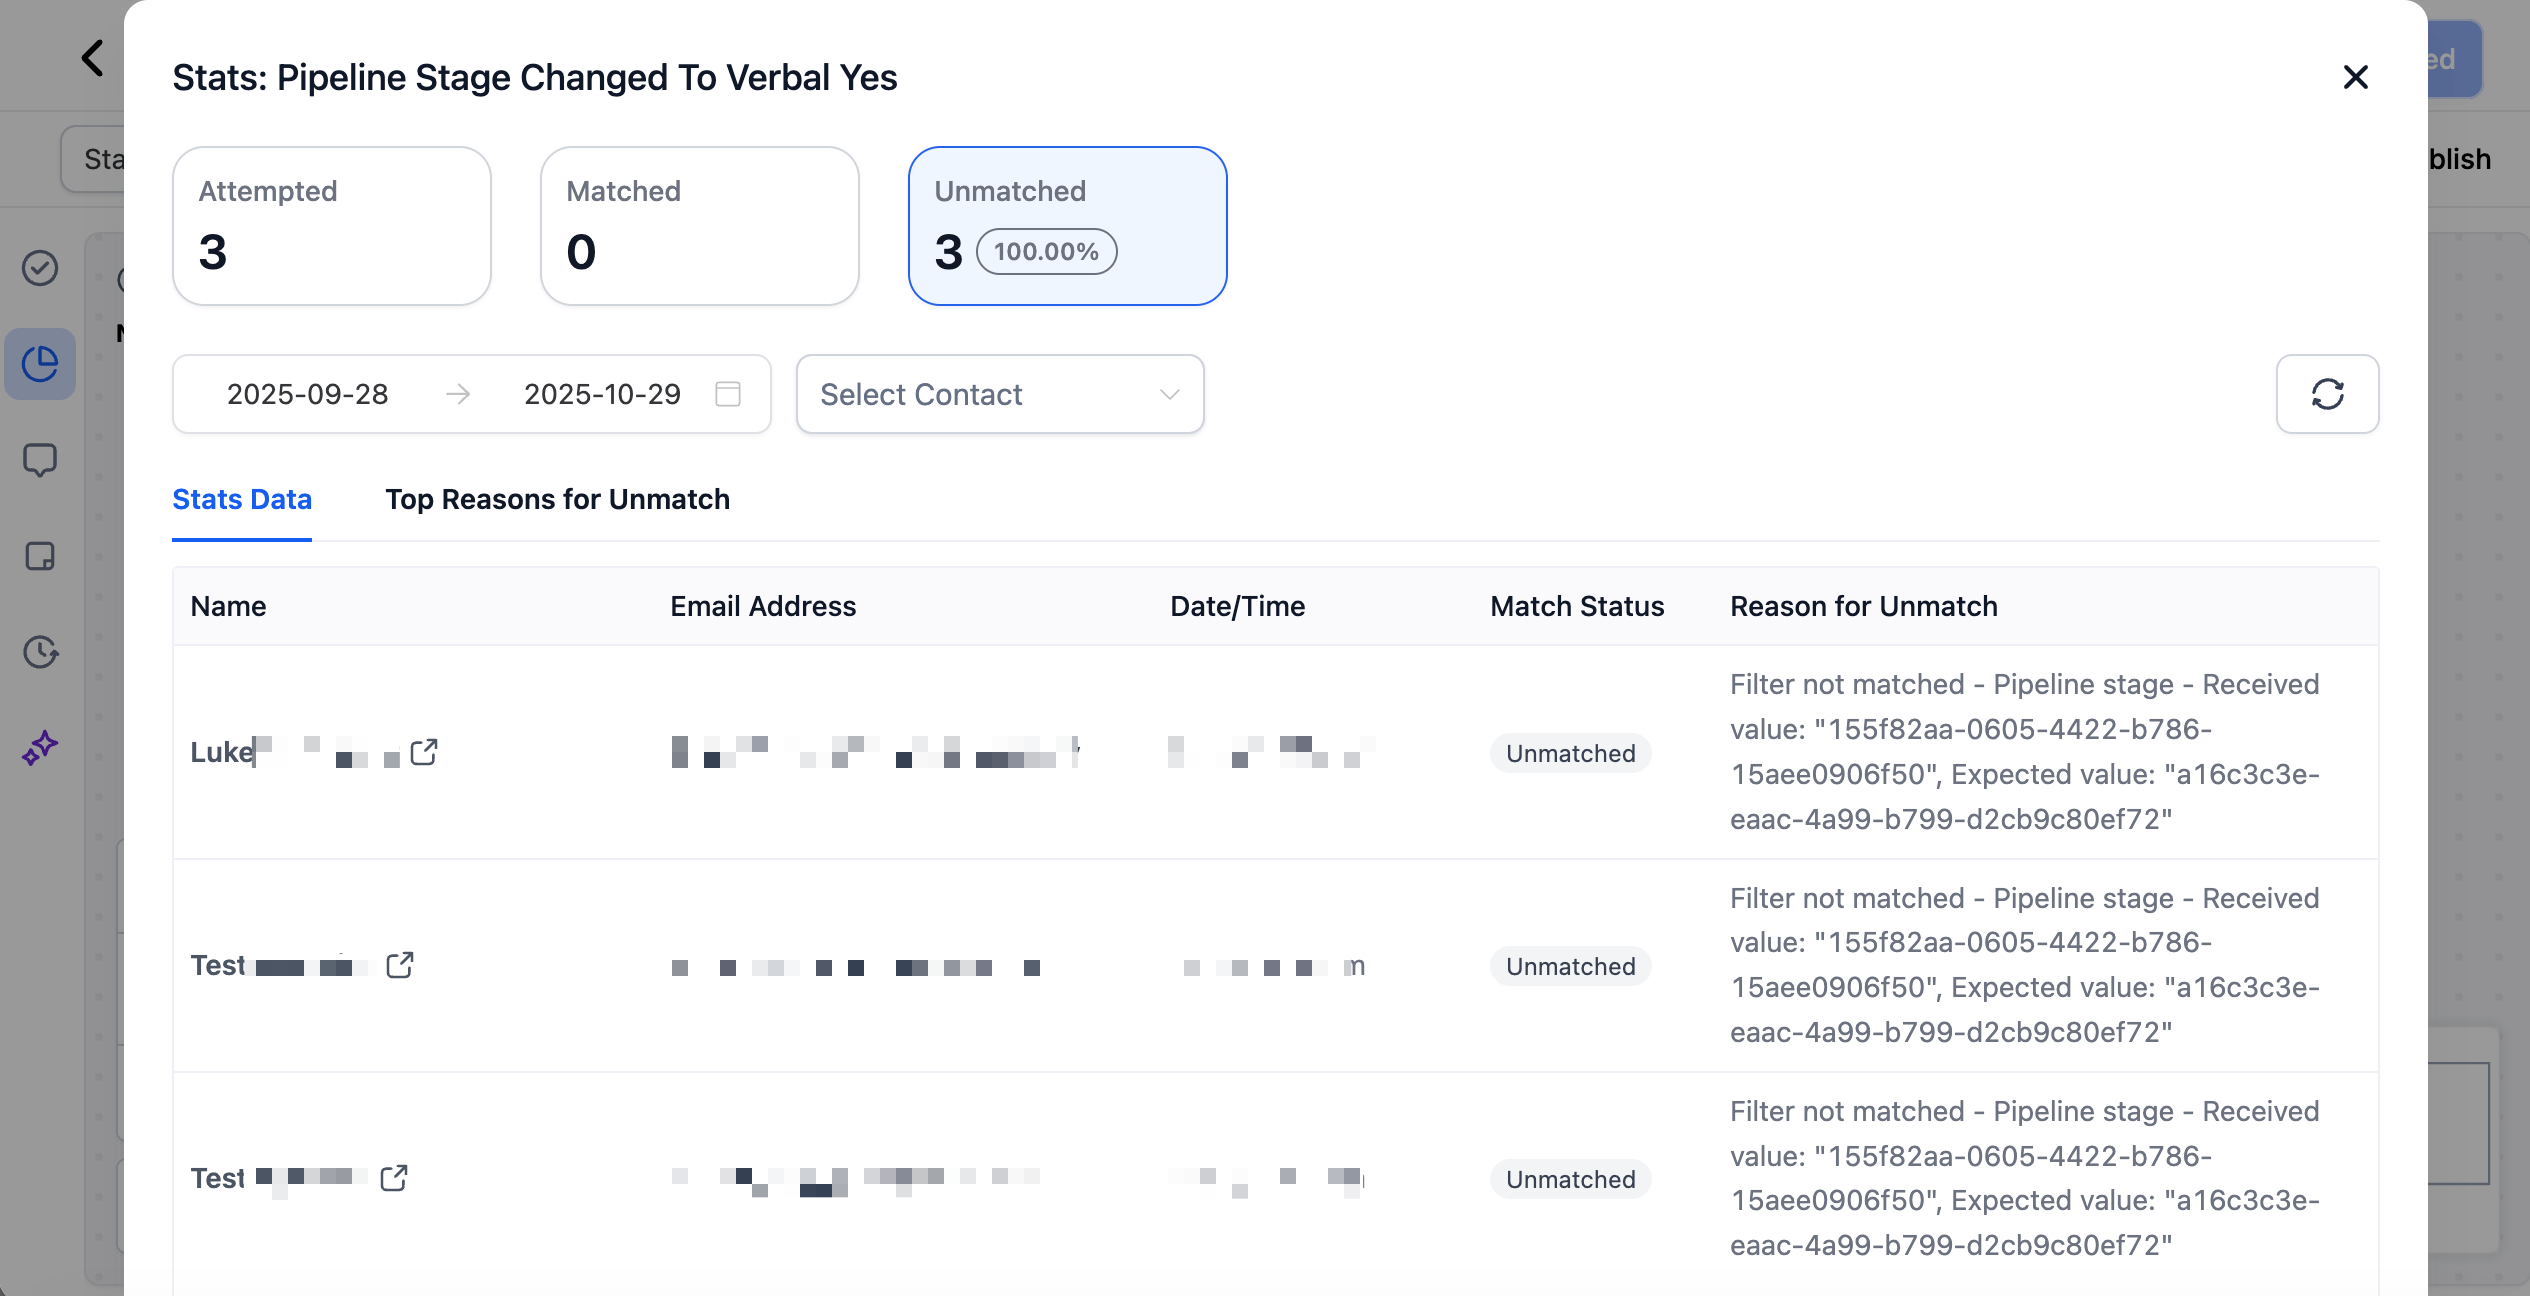
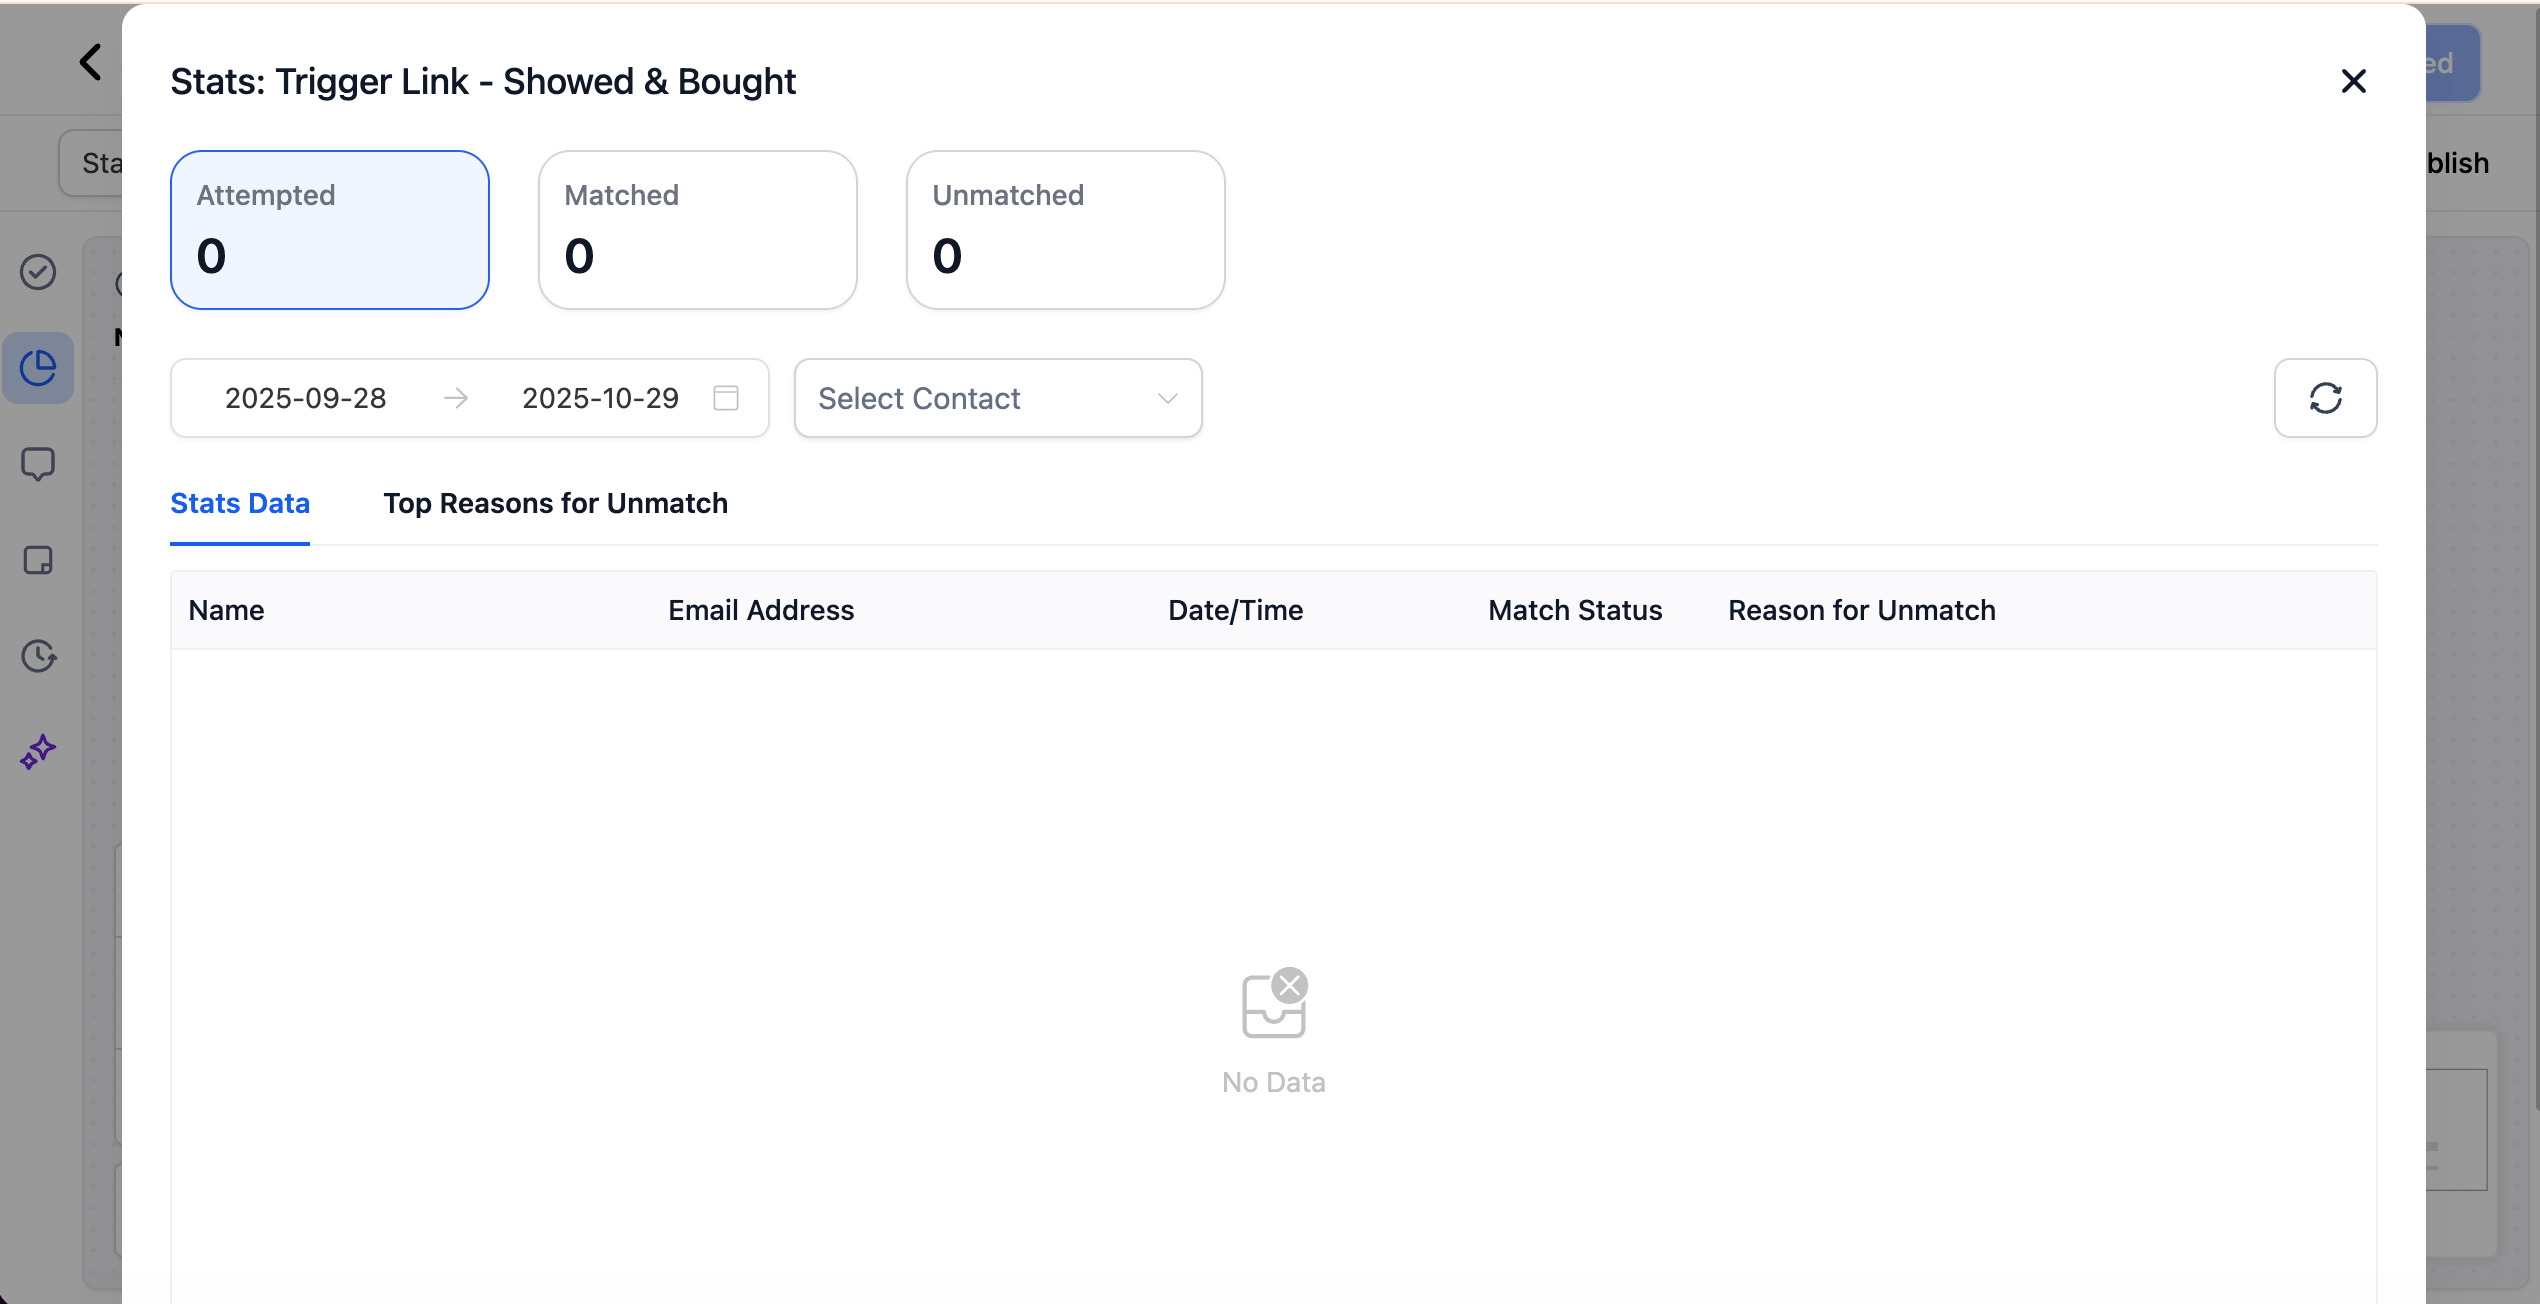
Click any metric to open a side panel packed with diagnostic details so you can fix issues without leaving the builder. What you’ll find:
- Contact name, email, and evaluation timestamp.
- Match status for each contact.
- Top 10 reasons a contact didn’t match (e.g., value mismatch, missing field).
- Search bar and date-range filter for laser-focused analysis.
Real-Time Analysis & Smart Filters #
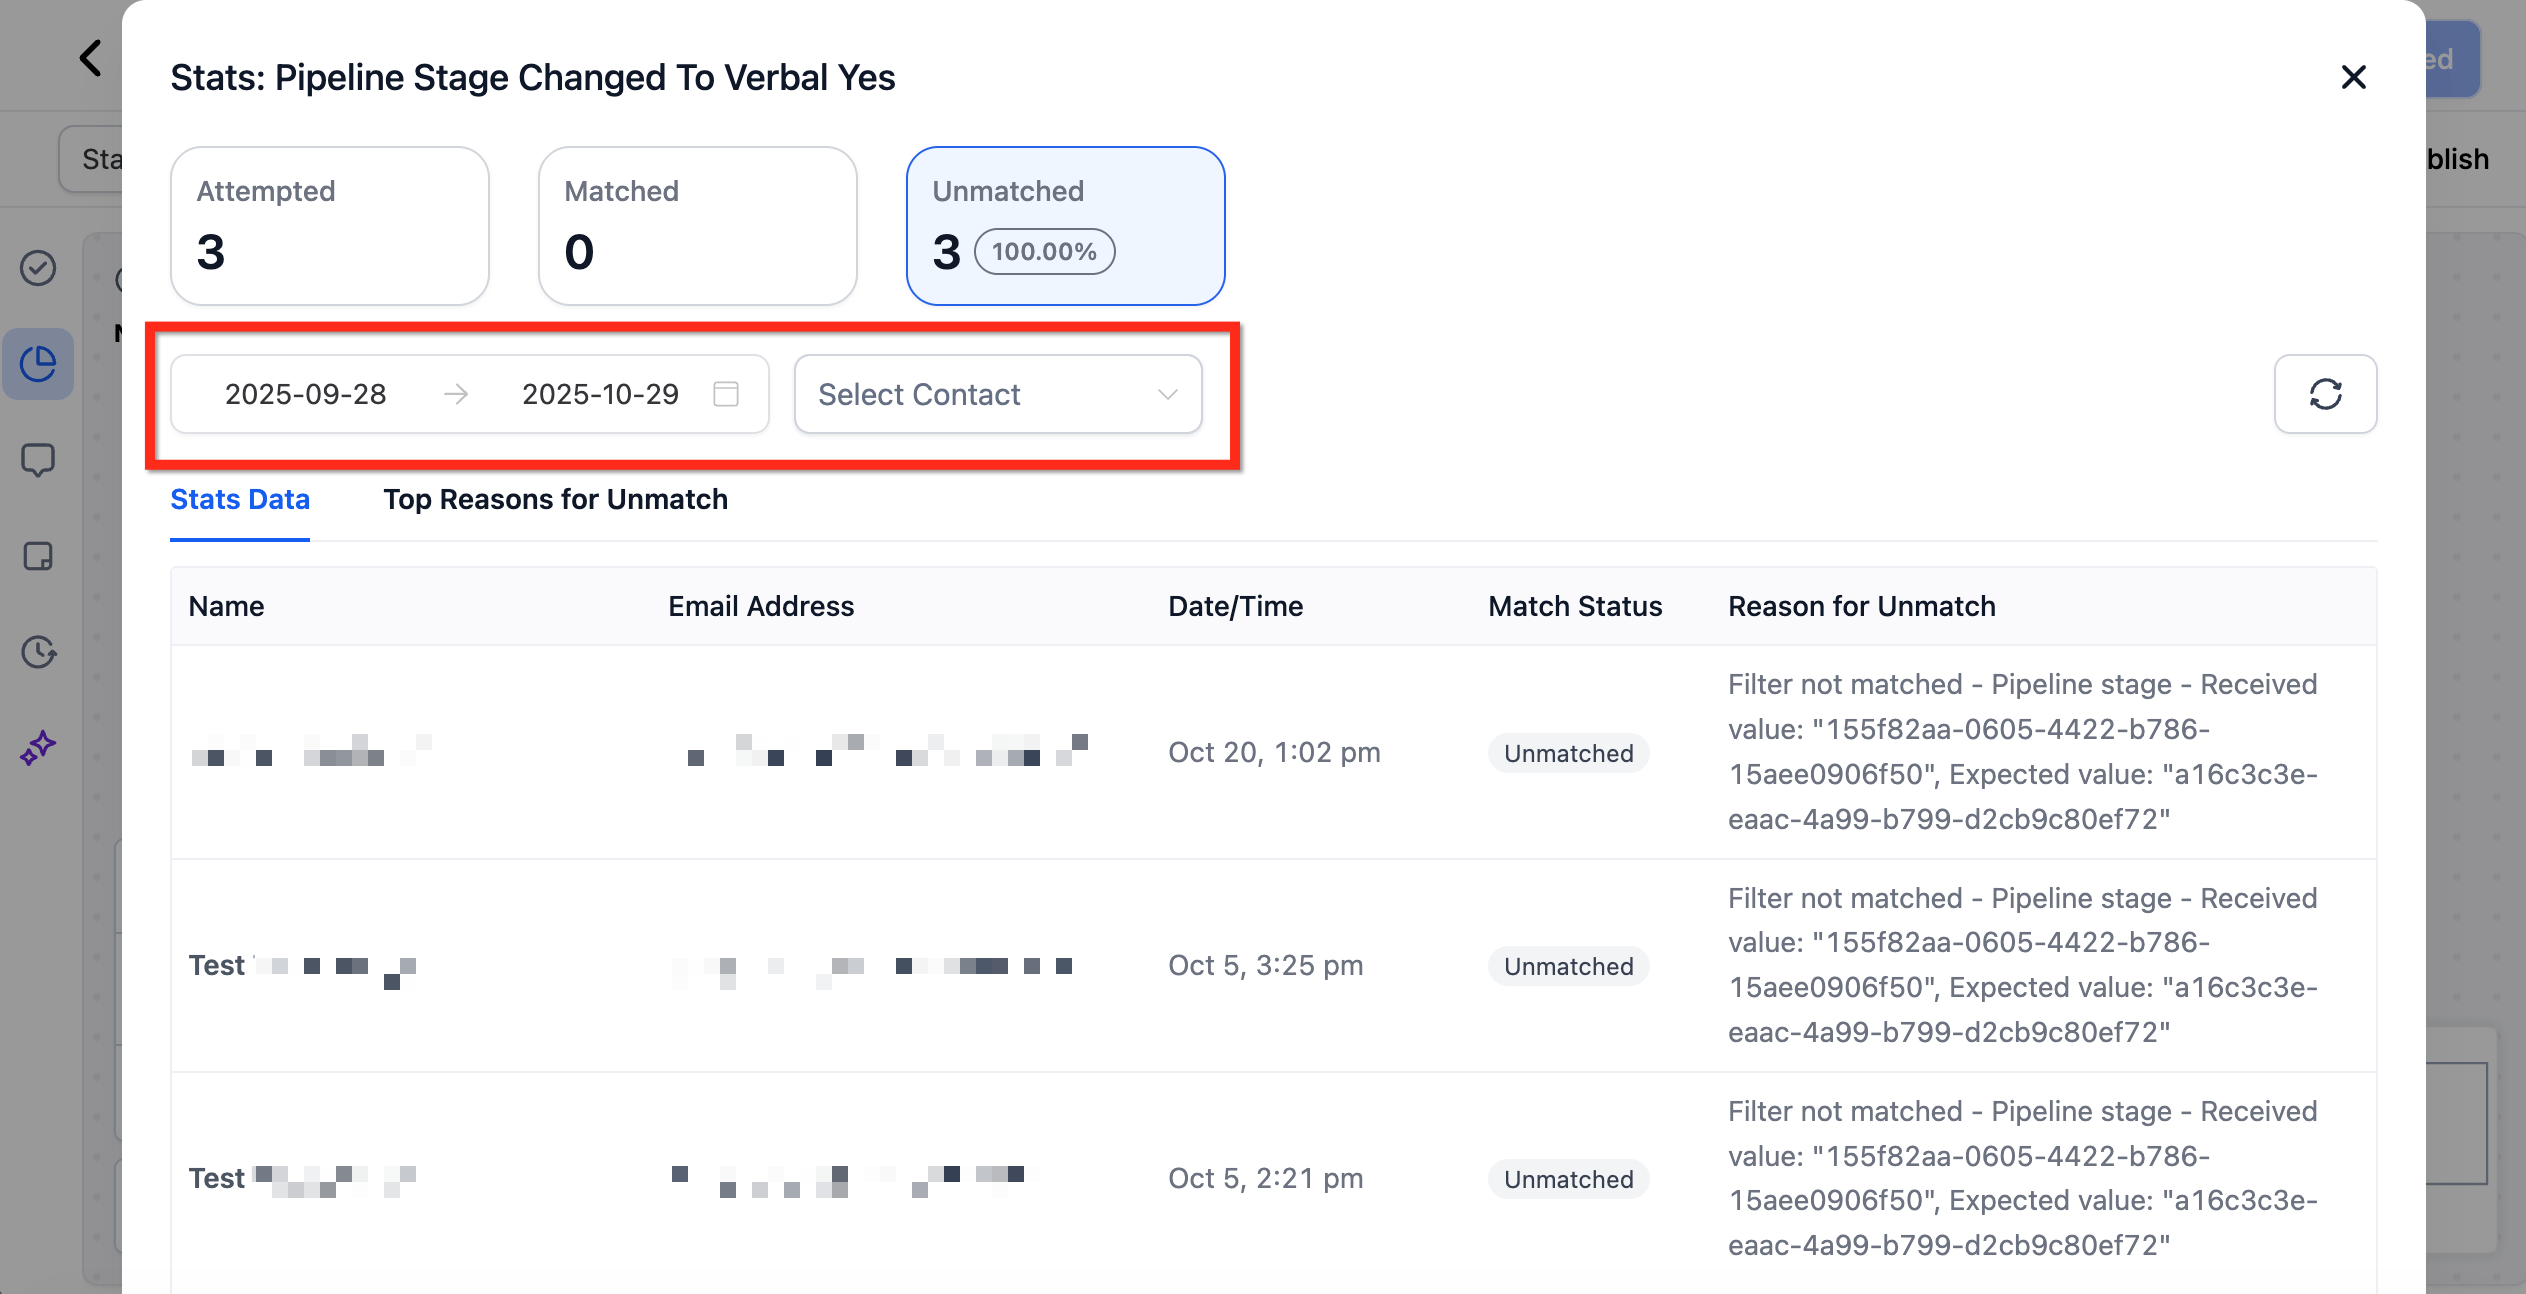
Trigger Stats updates live as events occur, so you can test a change, watch the numbers move, and confirm your fix immediately. Use built-in date and contact filters to isolate specific timeframes or individuals, ideal for studying spikes or validating test records.
How To Use Trigger Stats #
Step 1: Open the Workflow #
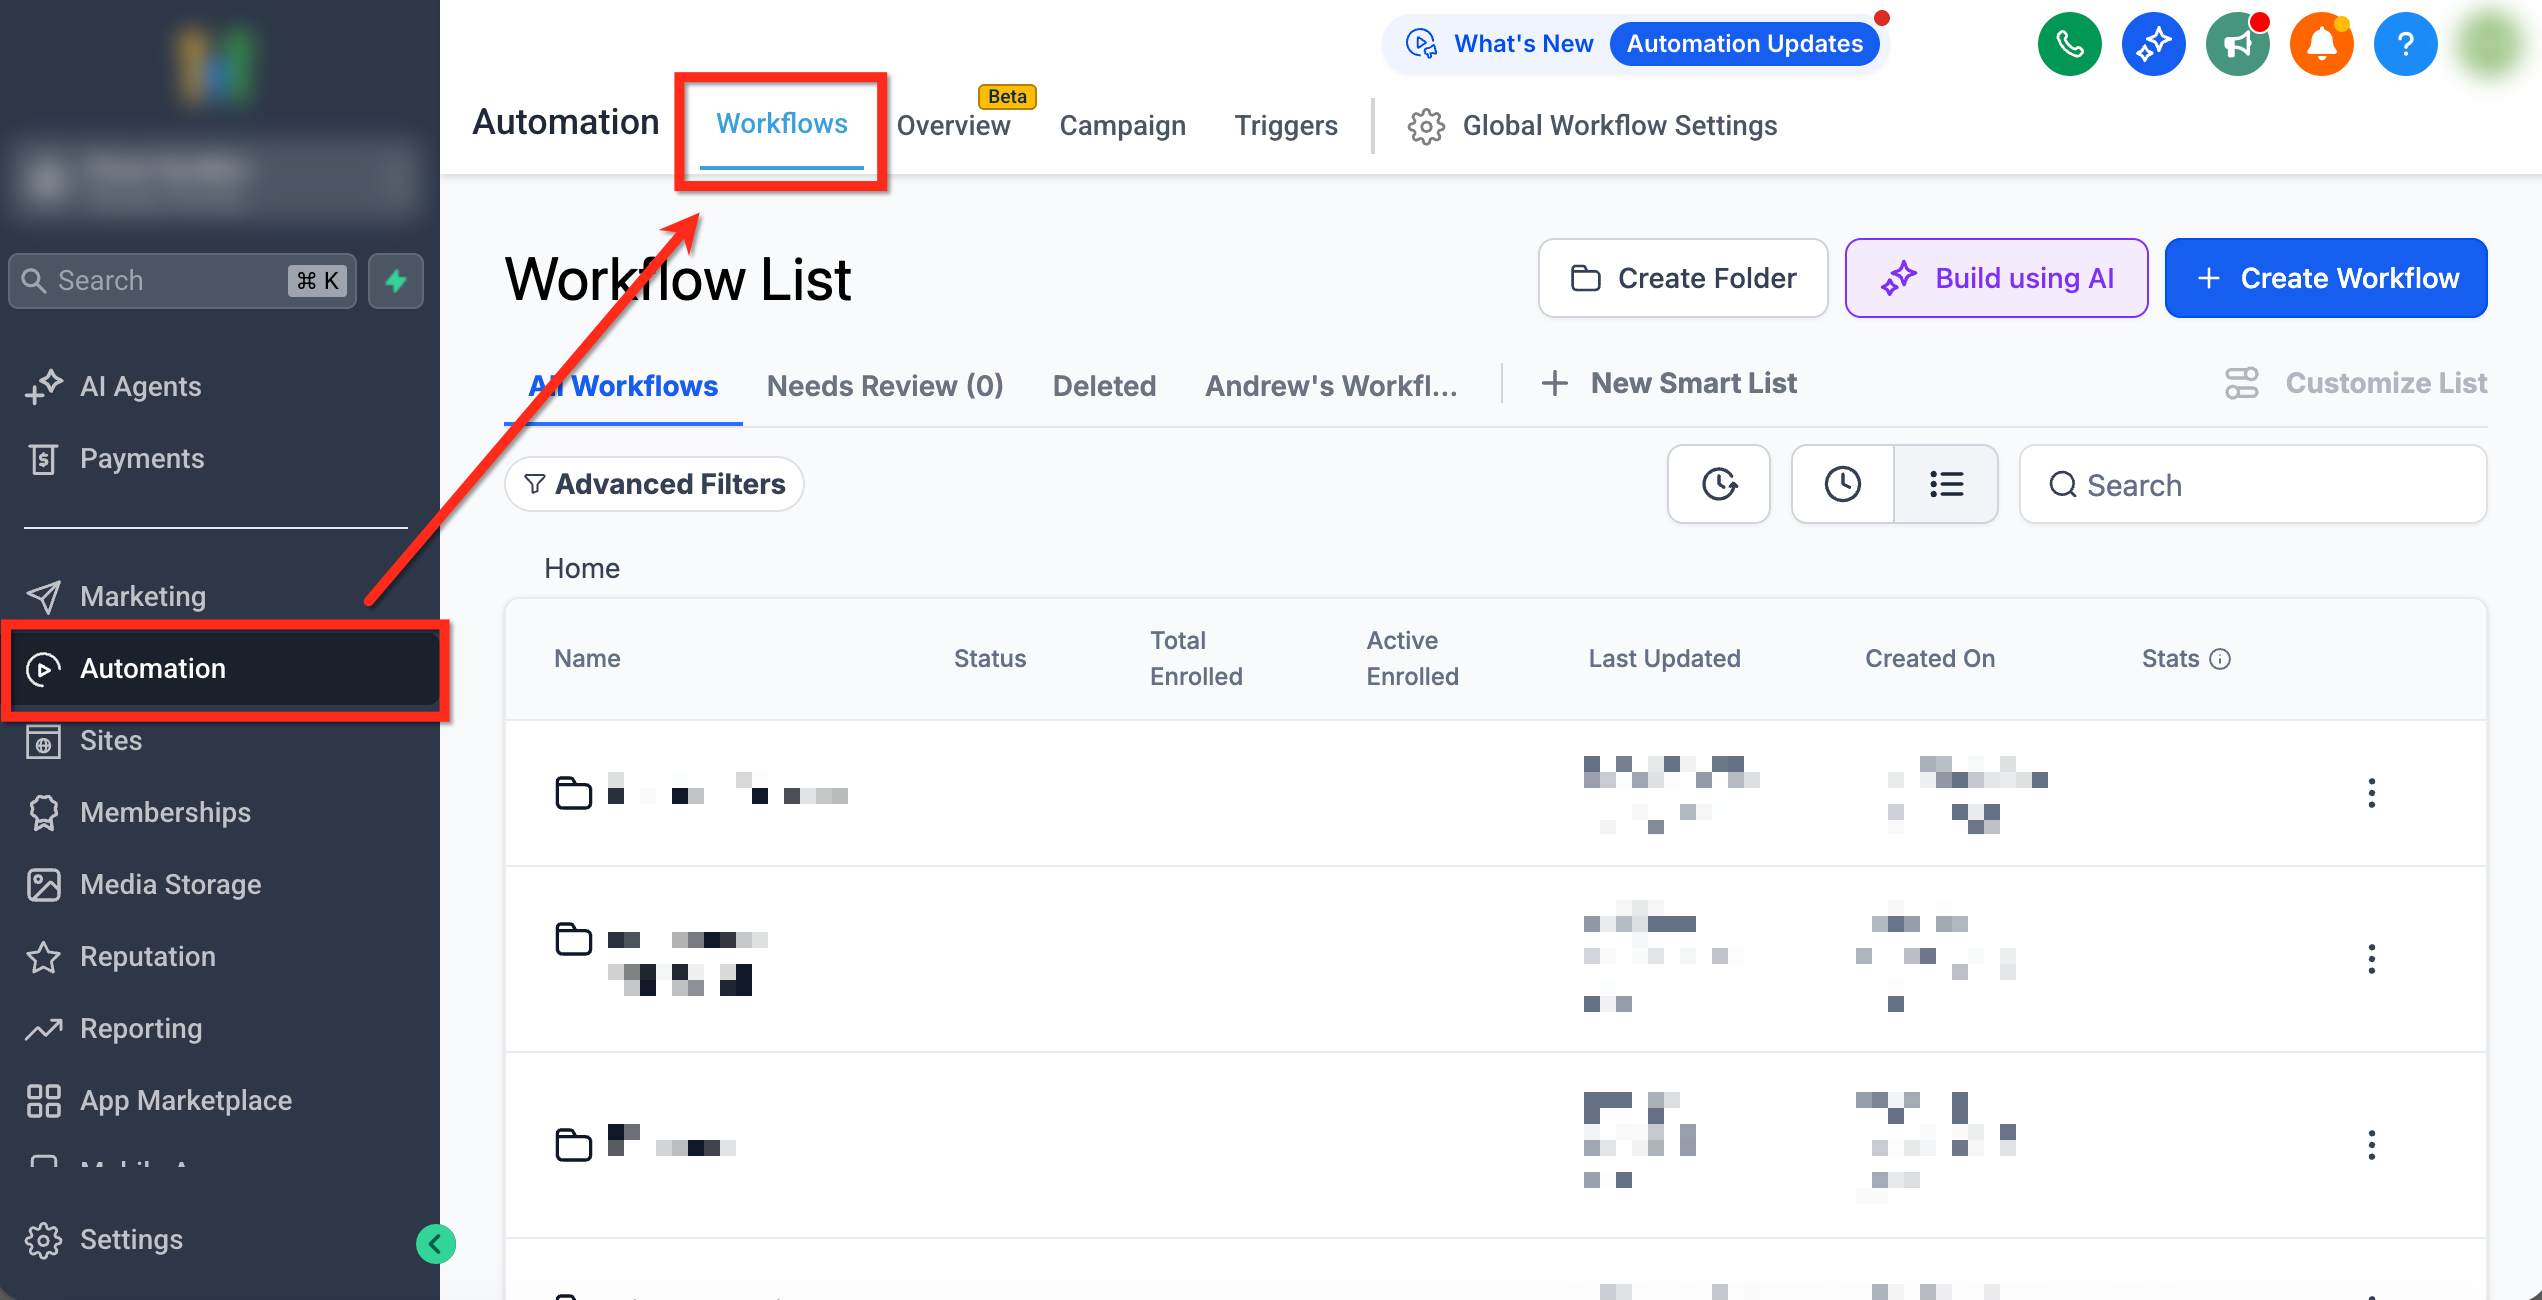
Navigate to Automations → Workflows, then open any workflow you want to analyze.
Step 2: Switch to Stats View #
Use the Stats tab at the top of the builder to load trigger-level metrics.
Note: A banner indicates the workflow is not editable in Stats View.
Step 3: Drill into a Trigger #
Click the Attempted, Matched, or Unmatched number on a trigger card to open the Trigger Stats panel.
- Filter and validate.
- Apply a date range or Select Contact to focus your analysis.
- Compare Received value vs Expected value in the Reason for Unmatch to identify mismatches.
- Adjust logic and re-check.
- Return to Builder (edit mode), update trigger filters or data standards, then switch back to Stats to confirm improvement.
Frequently Asked Questions #
Q: How often do the numbers refresh?
Stats update in real time; you’ll typically see new attempts within seconds of the triggering event.
Q: Does Trigger Stats change how triggers fire?
No. It only adds visibility; trigger logic and execution remain unchanged.
Q: What counts as “Attempted”?
Any contact evaluated by the trigger, whether it matched the filters or not, adds one to the Attempted tally.
Q: How long is data retained?
The Trigger Stats panel stores data for the last 30 days.


